Mount Fuji has profound importance and a mystical quality to the Japanese people. They refer to it as “Fuji-san,” a name of respect for the sacred mountain.
At an elevation of 12,388 feet, Fuji is the tallest mountain in Japan and unmistakable in photographs. If you’ve ever flown into one of the airports in Tokyo, you may have seen Mount Fuji rising from the clouds.
Shortly after we moved to Japan, my husband and I agreed that we had to climb this hallowed mountain before we left. The Mount Fuji climbing season was already over, so the trek was at the top of our list for the following year.
As my husband and I researched the Fuji climb and read other hikers’ accounts, we found many people who said they didn’t have a good experience. Many recounted stories of bad weather, massive crowds on the Fuji trails, or altitude sickness.
So, going into the hike, we didn’t actually expect to enjoy it. We thought of the Mount Fuji trek as something we would experience one time and check off our list.
Spoiler alert – it’s one of my favorite hikes we’ve ever done.
Contents (click to expand)
To the Summit of Mt. Fuji and Back in One Day
This section has a short summary of our climb. The detailed logistical information is in the sections that follow.
Planning for our trip was easy, because we did it “military style” with the support of Combined Arms Training Center (CATC) Camp Fuji, located in Shizuoka prefecture, practically in the shadow of Mount Fuji.
We took advantage of all of the benefits available to us as military retirees, including space-available lodging, transportation provided by the base Information, Tickets, & Tours office, and on-base facilities, such as the gym and Exchange.
(Who knew you could find military lodging at the base of Mt. Fuji!? Here are 12 other unexpected places you can stay on a military installation!)
All of these combined made the trip convenient, inexpensive, and stress-free, which contributed to making our trek up Mount Fuji one of our best hikes ever.
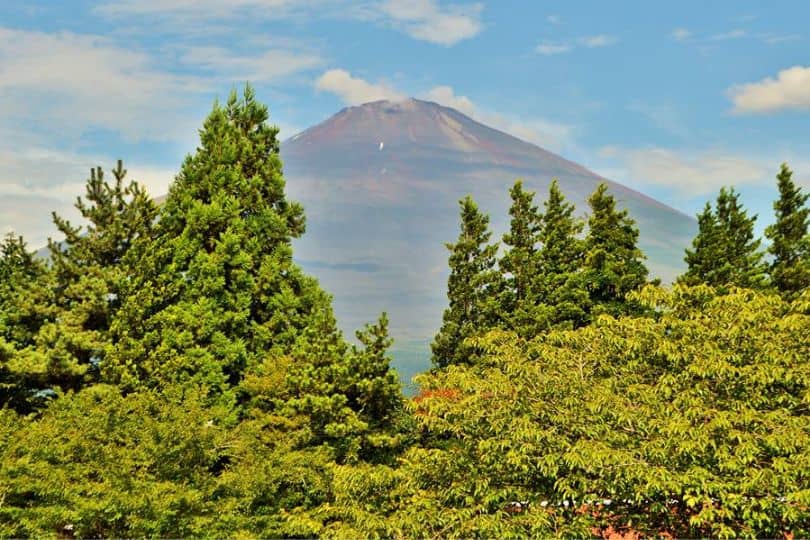
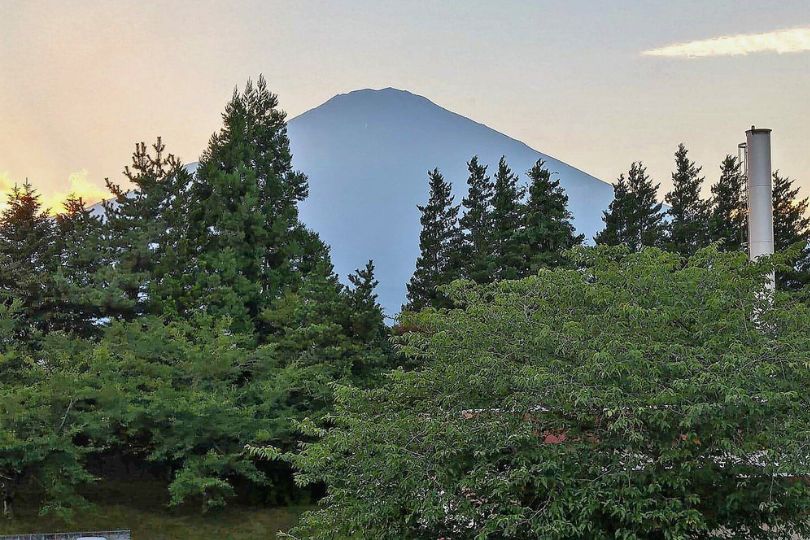
We arrived at Camp Fuji two days before our hike. The surrounding area is very scenic and peaceful.
On a clear day, we had an incredible close-up view of Mount Fuji hovering just beyond the base. Our early arrival gave us a day to relax, enjoy the view, and make sure we had everything on our checklist.
The morning of the hike, the shuttle we had arranged through the base Trips & Recreation Office picked us up at the lodge at 0500. We were the only passengers on the bus.
It took about an hour to get to the trailhead on the Fujinomiya trail (elevation 7874 feet). From there, the driver wished us luck and said he would meet us at the base of the Gotemba trail at 17:00. If we were late, we would need to take a taxi back to the base.
The Ascent: Fujinomiya Trail
We started our hike at 0600 on a beautiful, clear day. It was breezy and much cooler than at Camp Fuji.
Throughout the entire hike I wore a long-sleeved dri-fit shirt under a light fleece jacket. My husband wore a button-up hiking shirt and “wicking” undershirt. I was a bit warm at times, but the extra sun protection from the high neck of the jacket was better than sunscreeen.
On the way up, most of our fellow climbers were Marines from Camp Fuji along with a handful of Japanese, including a few solo climbers. The trail never got too crowded, and we ascended at a comfortable, steady pace.
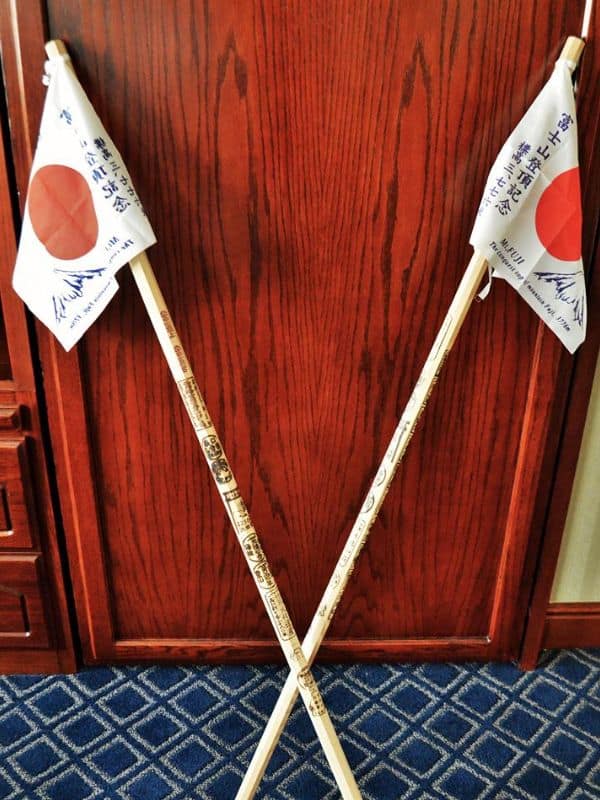
All of the Mount Fuji trails have rest stops called “stations.” (The base of the mountain is the first station and the summit is the tenth station). At each station, we stopped to have the station’s stamp branded into our Mount Fuji walking sticks, but we did not take any extended breaks.

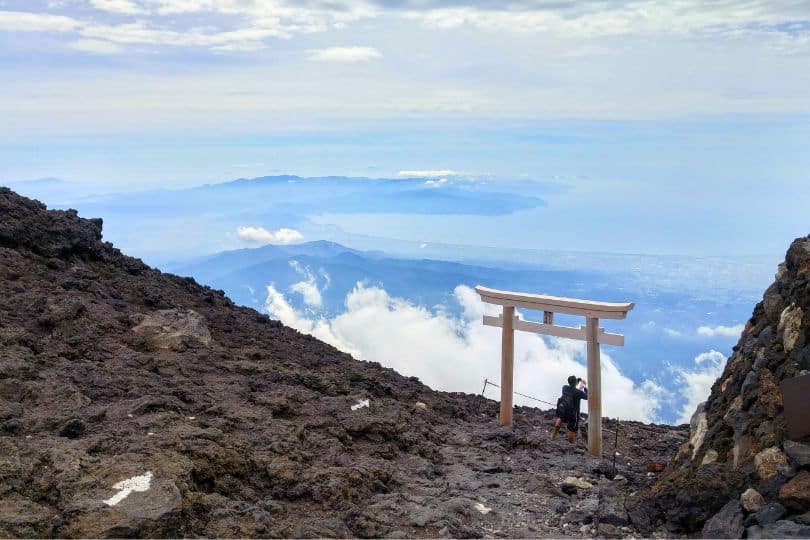
The views on the way up were spectacular, and it was amazing to stand on the iconic mountain that we had seen in so many pictures!
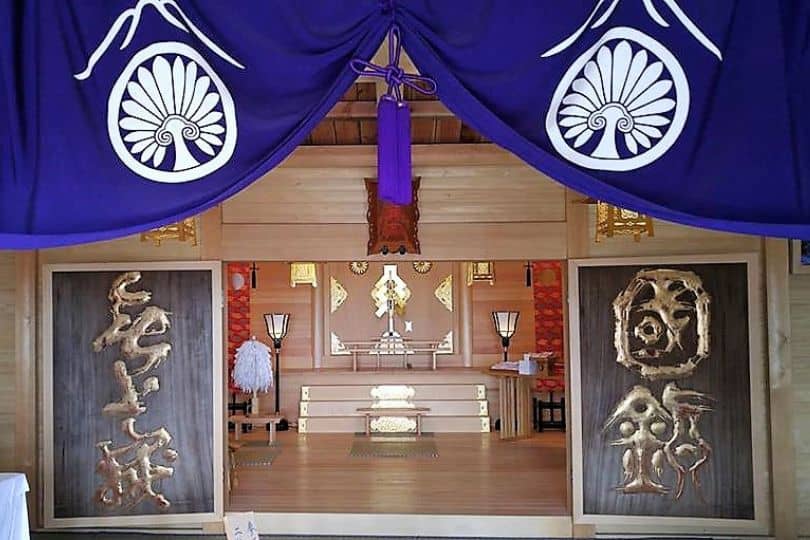
We reached the summit at about 1100. At the top of Mount Fuji are a beautiful shrine, a small ramen shop, and restroom facilities.
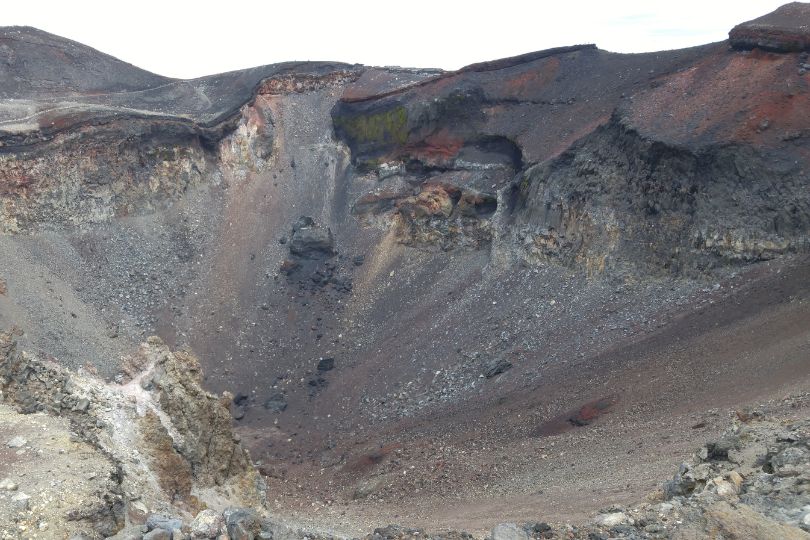
You can also view the massive crater of the Mount Fuji volcano. If you still have energy after your climb to the summit, you can walk the trail around the crater, which takes about an hour.
At least, that’s what we read, but we did not hike it. Not knowing what the Gotemba trail had in store for us on the way down, we wanted to allow plenty of time for the descent to ensure we didn’t miss our shuttle.
We spent about 45 minutes at the summit, enjoying the view, resting, and eating hot ramen noodles. Crazily enough, there is free WiFi on the mountain, but it only works in certain spots. At the summit, I couldn’t resist sending a few “greetings from the top of Mt Fuji” texts to my family!
The Descent: Gotemba Trail
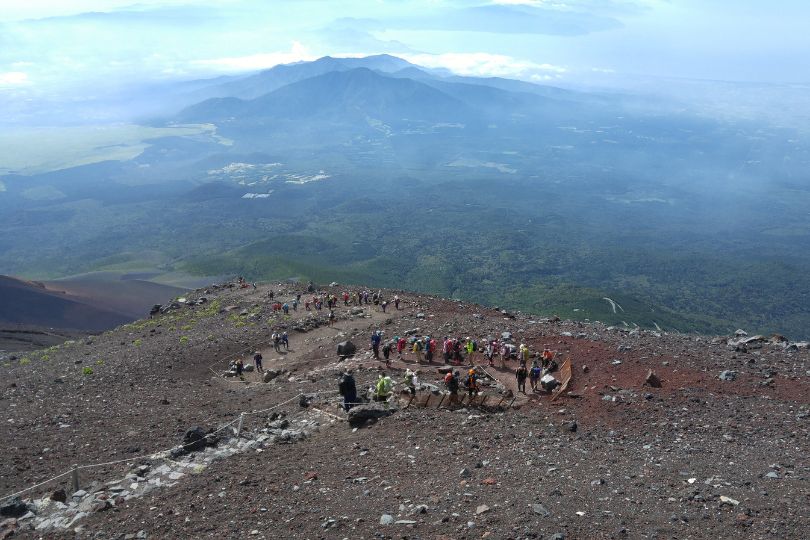
The Gotemba trail was a bit steep and slippery for the first 30 minutes, and we relied heavily on our walking sticks and poles. Eventually it flattened out and became a seemingly endless path of deep, loose, sand and ash.
The stations were few and far between, and there was virtually no vegetation (the images on this page gives you an idea of how it looks). It was quite foggy, so we were glad we had enjoyed our views on the way up.
There are parts of the Gotemba trail where you can run down the mountain with large strides, letting your heels dig into the deep ash, while covering three times as much ground as regular steps.
Sounds fun, right?
It was, for a while. But after a few miles, we were ready for some regular flat ground.
Despite having gaiters, we had to stop and empty our shoes, which were so full of sand that we barely had room for our feet. We were also covered head to toe in black ash.
We reached the last station before the Gotemba parking lot and realized we still had more than an hour before our shuttle was scheduled to pick us up.
As a reward for our accomplishment, we enjoyed a refreshing “shave ice” (you’ll likely have at least one of these while in Japan). Then we made our way to the parking lot, where our shuttle driver was waiting for us.
Round trip, including breaks, the Mount Fuji climb took 10 hours.
Logistics of Climbing Mount Fuji
Here’s what you need to know to plan your climb.
When to Climb Mount Fuji
The official climbing season is quite short: from early July to mid September. That means everyone is trying to climb during the same narrow window, and it can make for large crowds, especially on weekends and during the annual Obon holiday in mid-August (exact dates vary from year to year).
The best time to climb Mount Fuji is on a weekday, avoiding Obon week entirely. We did our climb in late August, and it was perfect.
Daytime vs. Nighttime
When planning a climb up Mount Fuji, you must first decide if you will climb during the day or at night.
Many climbers choose to start hiking in the afternoon and spend the night in one of the mountain huts at or near the summit so they can watch the sunrise from the top of Mount Fuji. Some people argue that seeing the sunrise is the whole point of the experience.
However, an overnight stay on the mountain introduces a whole new set of logistical issues, plus additional clothing and gear requirements. It can be extremely cold due to the strong winds, and the weather conditions at the top of the mountain are hit or miss.
We decided to keep it simple and climb during the day, starting in the early morning. We enjoyed breathtaking views all the way up, and the temperature was comfortable.
If we do the hike again, maybe we will try climbing Mount Fuji at night, but we were happy with our decision to do our first expedition during the day.
Weather
Keep in mind that no matter how hot it is at sea level (e.g. Tokyo) or even at the foot of the mountain, weather at high altitude is completely different. The air is dry and much cooler, and it’s usually quite windy.
So, don’t worry about being too hot, even in August. Instead, bring layers and a good windbreaker in case you are cold.
Training
You will enjoy your Fuji climb much more if you are physically fit! Remember those other hikers’ accounts I read who had bad experiences? A consistent theme was that they were ill-prepared because they were out of shape.
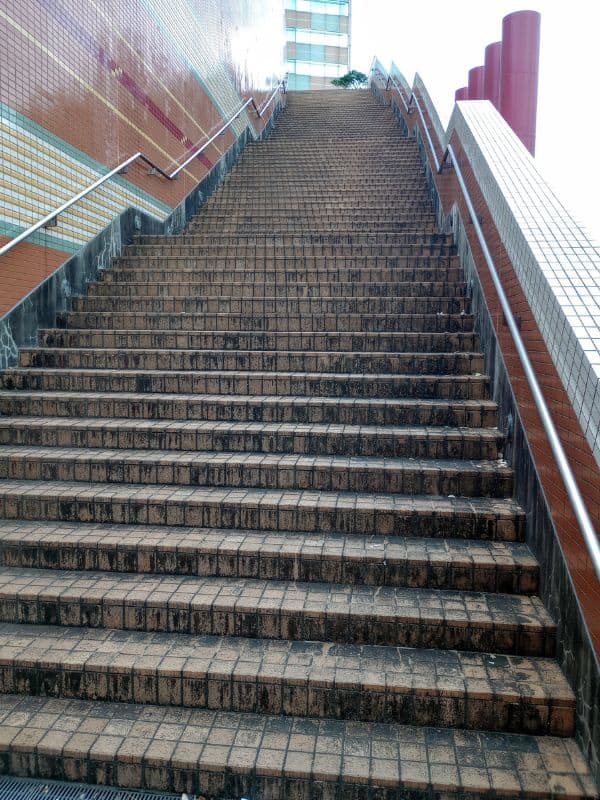
Most of our training was basic cardio (running, walking, elliptical) plus stairs. We found a very long set of outdoor stairs near us and trained there regularly in the weeks leading up to our hike.
The day or our trek, we were able to thoroughly enjoy the views and appreciate every moment of the day because we were in great shape! It’s well worth the preparation for what is probably a once-in-a-lifetime experience.
Altitude
Even the fittest climber may get altitude sickness. As a precaution, we took ibuprofen at the start of our climb, and we maintained a slow, steady pace. Fortunately, neither of us felt sick.
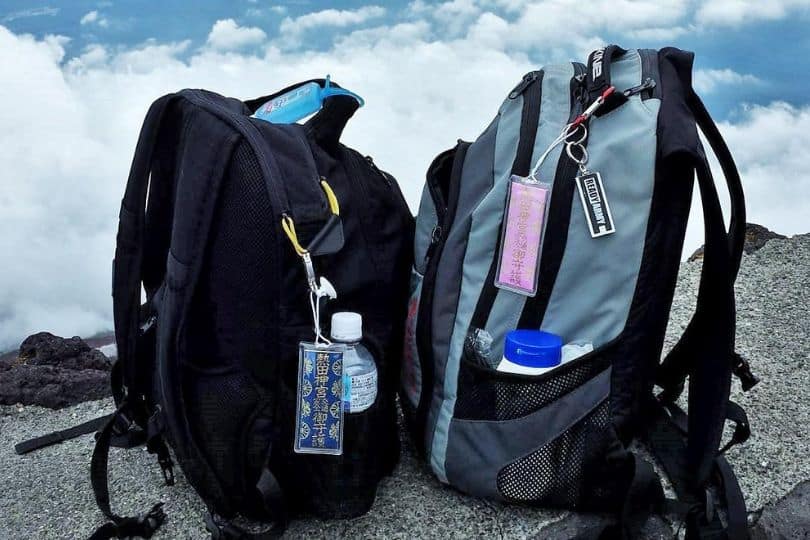
Gear and Last Minute Preparation
The ITT office has a checklist that I recommend following carefully to ensure you have the proper equipment. While there are a few items that you won’t need if you’re climbing during the day (e.g. headlamp), the rest is important. A few special mentions:
- Hiking poles. Poles are helpful on the way up and a necessity on the way down. We each used one hiking pole and our Fuji walking stick. You could get away with using only the walking stick, but the descent is steep and slippery in many places, so the extra balance of two poles is helpful.
- Sturdy hiking shoes or boots. My husband and I both wore low-top hikers and they worked well. You need shoes with a thick sole and good treads (I always choose hiking shoes with Vibram soles). “Fashion” sneakers or even regular athletic shoes won’t do the job.
- Gaiters. Whether you have low-top or full hiking boots, you will want gaiters for the descent, especially on the Gotemba trail. It’s almost entirely small pebbles and volcanic ash. Gaiters will help keep all that stuff from filling your shoes.
- Full-Coverage Hat: The sun is very strong at that altitude, and you need a hat that shades your neck. The hat should also fit tightly or have a neck strap, because the wind on Mount Fuji is powerful.
- Cash: Bring at least 5000 yen per person. Each climber must pay the admission fee of 1000 yen at the trailhead. Toilets cost between 100 and 300 yen (they are clean and well-maintained). Burns on your stick at each station cost 300 to 500 yen. You can also buy snacks and supplies at many of the stations and at the top.
I also read a preparation list from another source that recommended hikers cut their toenails. I followed that advice and cut mine extra short. It made the long decent less painful.
Mount Fuji Trails
There are four different trails leading to the top of Mount Fuji. The starting point of all trails is part way up the mountain at the “fifth station,” but each trail’s fifth station is at a different elevation.
If you are using the Camp Fuji shuttle, you don’t have a choice of which trail you climb, because the shuttle drop-off and pick-up points are designated. The year of our climb, the day hike started on the Fujinomiya trail and ended on the Gotemba trail. The night hike started on the Yoshida trail and took Gotemba on the way down.
Fujinomiya Trail: This is the shortest trail, but also the steepest. It is the second most popular trail. It was not very crowded when we began our climb at 0600. As we ascended and began to encounter climbers who had spent the night on the mountain and were on the way down, there were a few short bottlenecks at the narrower sections of the trail.
Yoshida Trail: Also called the Subaru trail, it is the most popular route and considered the easiest. As a result, it can get quite crowded, especially during the most popular climbing days. Fortunately, the ascending and descending trails are separate, unlike Fujinomiya.
Gotemba Trail: This is the longest and flattest trail, but I would not recommend using it to ascend. Most of the trail is volcanic ash, so it would be like trying to hike a mountain of quick sand. It wasn’t especially difficult on the way down, but it was very long, and even with gaiters, we had to stop and empty the sand from our shoes.
Subashiri Trail: This is one of the less popular trails and is generally not crowded until it joins with the Yoshida trail at the 8th station. Like the Gotemba trail, it has a section made of volcanic ash.
Getting to CATC Camp Fuji
We traveled to Camp Fuji by train from Nagoya. The closest train station to Camp Fuji is Gotemba.
I figured out the best way to get to Gotemba simply by using Google Maps and entering Nagoya station as my starting point and Gotemba station as my destination.
From Google Maps, I could see which trains to take, what time they departed, where to transfer, and how much they cost (yes, you can get all that information from Google Maps, which is why it’s one of our favorite travel apps).
From Gotemba station, we caught a taxi to the base. It took about 10 minutes and cost 2200 yen. The taxi dropped us at the pedestrian gate, which is only a 5-minute walk to the Mountain View Inn, the lodging facility on Camp Fuji.
Lodging
The Mountain View Inn has 34 rooms double-occupancy rooms. Space-A guests can reserve up to 60 days in advance.
We had a standard room, and it was very spacious with the usual base lodging amenities as well as a refrigerator and microwave. The Inn has a free laundry facility, which you will definitely need when you return from your hike.
Base Facilities
Camp Fuji is quite small, and you can walk from the Mountain View Inn to the main part of the base in about 15 minutes.
Big Guns Gym is the fitness facility. You can buy a Fuji walking stick at the store in Big Guns Gym (ours were $18). It’s slightly more expensive than buying it on the mountain, but it also has the Camp Fuji stamp branded into it.
Information, Tickets, & Tours (ITT) is located in Building 416. We booked our shuttle to Mount Fuji ($25 per person round trip) through this office. The Fuji shuttle service drops you at one trailhead and picks you up at another.
You can choose between a day hike and a night hike. The year of our hike, shuttles were available on Fridays and Saturdays from July 1st through September 3rd. ITT provides a comprehensive gear list and other climbing advice. However, they do not offer guided hikes – they simply provide the shuttle.
ITT also offer many other trips and tours. The day after climbing Mount Fuji, we hopped on the first leg of a day trip to Tokyo and got a direct shuttle to the New Sanno hotel (a luxury hotel that is run by the U.S. Naval Joint Services Activity) for $15 per person.
The Marine Corps Exchange (MCX) is small. It has snack food, select household and personal care items, Marine clothing & sales, and a few local souvenir items.
Dining: Retirees cannot eat in the mess hall except on certain holidays. The food court has a pizza restaurant and a Subway. The Roadhouse Enlisted Club and Station 4 SNCO/O Club also serve food, and both clubs have full service bars.
That pretty much sums it up for the facilities you’re likely to use on this small base. Camp Fuji does not have a commissary, so you will need to buy snacks for your hike at the MCX or at the 7-Eleven down the street from the pedestrian gate.
Also, make sure you have all of the hiking gear and clothing you need before you get there, because you will not be able to buy or rent those items on base.
Ready to Climb Mount Fuji?
Our trek to the summit of Mount Fuji was an epic climb and an experience we will always remember. Doing a day hike was the best choice for us, and I recommend it to anyone climbing Fuji for the first time. We still saw the sunrise and had fantastic views, but the logisitics were much easier, and we didn’t contend with extreme weather.
Either way, if you plan to be in Japan during the climbing season, I highly recommend making the Fuji hike a priority!
Great article. I did the climb back in ’73. I was young and it was not difficult. Besides the abundant stocked fishing streams it was probably the most fun I experienced while stationed at Yokota. Sliding back down the lava flow was a blast.Getting stopped for speeding in my 1972 Mustang on my way back to base, not so much. I was so lucky the police couldn’t speak English.
Great story, thank you for sharing! From what I understand, the numerous rest stations on the way up the mountain are relatively new, so I’m guessing you didn’t have the benefit of those facilities back in ’73. I think you could still get lucky and find a police officer who doesn’t speak English!
We did the climb in July 2016 and ran out of money so we couldn’t use the bathroom on the way up lol! We assumed there would be an ATM at tht 5th station that we could replenish our cash (after paying the fee, breakfast, etc). Then when we tried to use our credit card in the gift store for souvenirs, it was a $~30 minimum, so we bought like 4 boxes of chocolates (huge ripoff!). Bottom line, HAVE lots of CASH…there is NO ATM!!
Other than the money situation, we loved the climb, view, sense of accomplishment :)…and the food they served was shaped like Mt Fuji (a volcano of rice!).
We missed the Fuji-shaped rice! We will have to do the climb again to get some 🙂