Year-round RV living doesn’t mean you need to snowbird every winter! With the right preparation, you can live in your RV quite comfortably, even in cold, snowy weather. Guest contributor, Julie Chickery, has expert tips for staying warm and safe in your RV, no matter where you spend the winter!
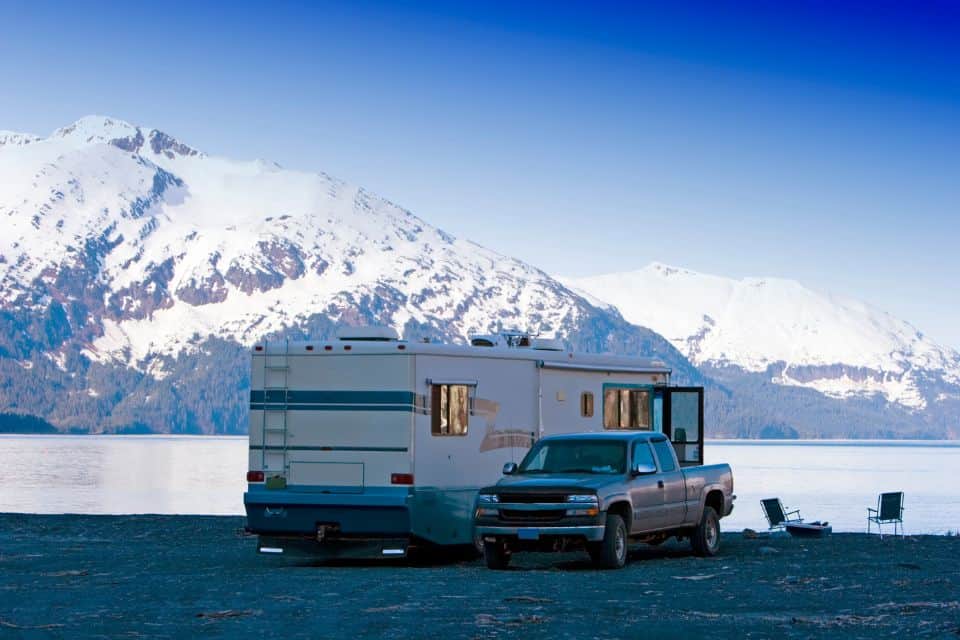
If you plan to travel in your RV this winter and don’t want to head south with the masses, you’re in luck. Winter RV living is not only possible, it’s actually quite comfortable IF you know the right tips and tricks. In this article, I’ll share how to make sure your home-on-wheels stays warm throughout the season regardless of type: motorhome, fifth wheel, or travel trailer.
Whether you’re living full time or just spending part of each year in cold climates, read below for my best advice on ensuring that everything inside your RV stays at its optimum condition no matter what happens outside!
Look for Year-Round Campgrounds
The most important consideration of cold weather camping or RV living is location. It’s important to realize that many campgrounds and RV parks in areas with freezing winter weather are not open year-round. These seasonal campgrounds typically close in late fall and don’t reopen until the spring.
Seasonal closures are due to lower demand during non-peak times of the year. It may be too costly for campgrounds to remain open for just a few campers.
In addition, lower temperatures can pose safety hazards to both the campground and RV equipment if you aren’t fully prepared.
So, if you have your heart set on a beautiful snow-covered winter in your RV, make sure you verify that your chosen location is available.
Choose the Right Type of Heating
One of the most important things to consider when RVing in cold weather is how you will keep your RV warm.
The most common method is to use your RV’s heating system. Most RV heaters run on propane and are very effective, particularly with a smaller RV. However, you need to confirm the availability of propane in advance.
Your propane furnace can go through a lot of fuel if used continuously, so you’ll need on-site access to propane or sufficiently clear roads to go refill your propane at another location.
Some campgrounds and propane companies can even provide you with a large external propane tank to use during the coldest months so you don’t need to refill as often.
Depending on the size and layout of your RV, you will likely need to invest in a space heater or two.
These small heaters are a great way to warm your living space and can really make a huge difference in your daily comfort during especially cold weather. They are also easy to store for the rest of the year.
The two most common types of space heaters are electric and propane.
Electric heater: This type is especially popular when you are connected to power in a campground or RV park. You can use more than one, which will reduce your dependence on your RV’s furnace, especially if you have a larger RV. We use this electric heater, which also has a cool air fan for use during the summer.
Propane heater: These heaters use propane gas as fuel and are a good option if you are billed extra for electricity. The initial purchase can be a bit more expensive than electric space heaters, but they are often more efficient. If you use a reputable brand, like Mr. Heater, it will come with a safety shut off low oxygen sensor.
If you are using portable space heaters, take extra safety precautions, such as:
- Never leave a space heater unattended.
- Only use a propane space heater in well-ventilated areas.
- Make sure the area around the heater is clear of any flammable objects.
- Keep a fire extinguisher close by in case of emergency.
You can also reduce the amount of heat that you need to use on cold nights by using flannel sheets and electric blankets or a thermal sleeping bag.
Protect Your RV from Heat Loss
Whether you are using propane or electricity for heating your RV, you still need to take additional steps to keep the heat in and the cold out. One of the most important ways to protect your RV from heat loss in the winter is to make sure it is well-insulated.
If you’re planning to do a lot of winter RVing, consider purchasing a four-season rig. Keep in mind that virtually no RV is constructed for sub-zero temperatures, but there are some that can handle freezing temperatures well.
While there is no industry standard for a four-season RV designation, the most important thing to look for is superior insulation in the interior walls and ceiling, as well as in the basement storage. This insulation goes a long way towards keeping the warm air inside your RV.
Don’t worry if you don’t have a four-season RV. There are still several steps you can take to minimize any potential heat loss by adding extra insulation yourself.
First, look for drafty areas around your RV windows, skylights, fans, doors, slide-outs, and roof vent that allow the cold air in. Then, make sure to seal them with weatherstripping.
Foam inserts also create an effective barrier in skylights and the back of cabinets.
If you don’t have dual pane windows, consider using additional insulation in the form of foam panels or a product like Reflectix, a highly-pliable thermal insulating material. This extra insulation will help keep the heat in the RV and prevent it from escaping.
The advantage to using panels cut to size is that you can easily remove them on warm days to allow in more sunlight.
Another simple fix is to install weather blocking or thermal curtains in your RV. While most RVs come with blinds and valances, you can easily add tension curtain rods under the valance to hang curtains.
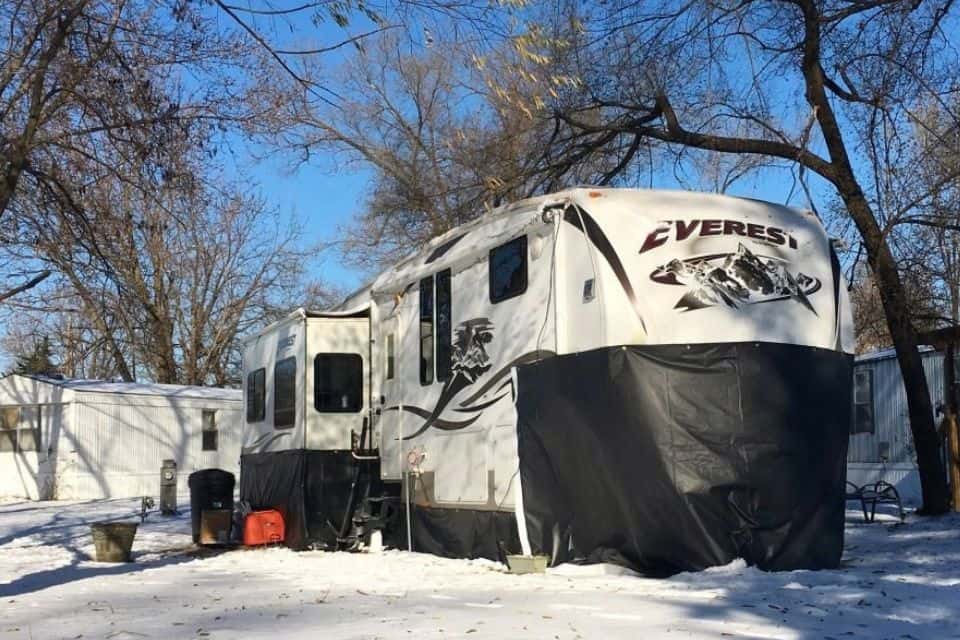
Install Skirting Around the Bottom of the RV
Insulation doesn’t only apply to the interior of your RV. One way to manage extreme temperatures in the winter is with some type of skirting around your RV.
Skirting is simply a material that you attach to the bottom of your RV, encircling it completely. This will create a barrier between your RV and the cold ground, helping to keep your RV warmer in the winter.
You can buy RV skirting at camping stores, but one unique product I recently saw at a trade show is called AirSkirts. This inflatable skirting system is made of heavy-duty PVC that serves as insulation and also acts as a barrier against wind, snow, and ice.
AirSkirts come in nine different sizes to ensure the proper fit and are inflatable so that you don’t need to affix the skirt to your RV with any type of snaps or adhesive.
The AirSkirts website helps you select which skirting kit you need based on the type/size of your RV. Use the coupon code “POPSMOKE” to save $100!
If you’re not interested in buying ready-made skirting for your RV, you can also create your own DIY version using some basic materials available at any hardware store. Here’s how:
- Measure the height and width of your RV. You’ll need these measurements to create the skirt template.
- Cut foam insulation boards or heavy plastic about one inch higher than the height of the space between your RV and the ground.
- If using plastic, attach elastic bands to each side so that it will fit snugly around your RV.
- Install the foam board or plastic skirting around the base of your RV using adhesive or zip ties. Don’t use duct tape, as it will take the paint off your RV.
Remember to check the policies of the RV park where you plan to stay. Some parks have specific rules about the type of skirting allowed.
Minimize Moisture Inside Your RV
Once your RV is all warm and cozy, beware of the dangers of condensation. The resulting excess moisture can cause a big problem in RVs during the winter, as it can lead to the growth of mold and mildew.
The best solution to prevent excess moisture is using a dehumidifier. Dehumidifiers remove the moisture from the air and deposit it in a holding tank that must be emptied and cleaned regularly.
There are two different types of dehumidifiers: passive and electric.
- An advantage of passive dehumidifiers is that they do not require power. (We like this one when we’re not connected). Most passive dehumidifiers use calcium chloride crystals to pull the moisture from the air. The crystals need to be replaced regularly.
- Electric dehumidifiers typically have a higher capacity than passive models, which makes them more effective at removing moisture from the air. When we have power, we use a couple of these.
This renewable dehumidifier is a hybrid of the two. You recharge the silica gel beads every 20 – 30 days, so you don’t need power to use it.
Keep the Water Flowing
If you’re going to live in your RV during cold weather, it’s especially important to take steps to protect your water supply. Your RV has three distinct water tanks: fresh, gray, and black.
Fresh Water Tank
During the winter, you’ll want to keep your fresh water tank as full as possible. This is necessary for two reasons.
The first is that you must disconnect your water hose from the water spigot any time the outdoor temperature drops to freezing. You will need plenty of water to continue using your RV’s sinks, showers, and toilets.
The second reason for keeping those water tanks topped off is that more water in your tank, combined with the skirting previously discussed, reduces the chance of it freezing.
Your best bet is to use a heated water hose throughout the winter to reduce the chance of a catastrophe for those times when there is an unexpected dip in temperature.
An important feature to look for is Ground Fault Circuit Interrupter (GFCI) protection. These specialty hoses can be quite pricey, so if you are handy, you may also want to consider using heat tape or a heat cable.
Even with a heated hose, campgrounds will typically require you to disconnect overnight when temperatures are projected to dip below freezing to prevent any damage to the water line, water pressure regulator, and associated hardware.
Holding Tanks (Gray and Black Water)
If you don’t have a four-season RV with heated underbellies and insulated holding tanks, you still have options.
If the temperatures only drop below freezing at night, simply keeping your gray and black wastewater tanks closed until it is time to dump them will suffice. However, if you’re going to stay somewhere with prolonged freezing weather, then you may want to invest in an RV tank heater kit.
These consist of thick heater pads for your fresh, gray, or black tanks, as well as an elbow heater pad for the water pipes. The tank heaters come with a sensor that will automatically turn them off. The product is fairly straightforward to install and will ensure your tanks aren’t damaged or cracked as a result of freezing.
Sewer Hose
Finally, don’t forget about your sewer hose. To avoid damage that can be caused by freezing, do two simple things.
First, keep the hose off the ground using an inexpensive sewer hose support.
Second, keep it disconnected when the weather is expected to dip below freezing. If you will be stationary for the winter and don’t want to disconnect your hose regularly, you can purchase a more expensive sewer hose made with thicker material.
Keep Up with Battery Maintenance
Even when you are connected to shore power at an RV park, you still need to use your RV batteries (also known as house batteries) for many things, such as overhead lights, fans, water pump, and water heater.
While your RV converter is intended to keep your batteries charged when connected to power, batteries tend to lose their charge more quickly in cold weather. It’s crucial to take steps to keep them warm. Just how warm they need to be will depend on the type of batteries you have:
- Standard flooded wet cell lead acid batteries are the most common type of RV battery because they are the least expensive. However, they are also the most susceptible to cold weather and require more upkeep.
- Absorbent Glass Mat (AGM) lead acid batteries are more reliable in cold temperatures, require less maintenance, and last longer than the flooded cell battery.
- Lithium batteries have the longest lifespan and require virtually no maintenance. Battle Born, one of the leading manufacturers of this type of batteries, installs a battery monitoring system in each battery with an automatic shut off that keeps them from charging at 25 degrees to protect them from damage.
Regardless of what type of battery you have, using a heat pad can keep the battery warm enough to accept the charge. Purchasing a heat pad with an ambient temperature sensor is the best option because it automatically turns on when the temperature is below 35 degrees and switches off when it reaches 45 degrees.
Practice Safe Driving
If you’re going to travel between campgrounds during the winter, it’s a good idea to follow these basic tips for driving your RV in winter weather conditions:
- Check your tires regularly and ensure that they are properly inflated.
- Drive slowly and avoid sudden stops or changes in direction.
- Keep a safe distance from other vehicles.
- Avoid dangerous roadway and weather conditions by staying up to date on weather forecasts and road closures.
You should also keep an emergency kit in your vehicle that includes:
- Ice scraper and snow brush
- Shovel
- Sand or kitty litter
- Road flares or reflectors
- Blankets
- First Aid kit
- Extra clothing, including hats and gloves
- Bottled water and snacks
Summary
If you’re planning some winter camping this year, make sure to prepare your RV accordingly. Keep in mind that one of the most important things you can do is to buy all of your materials and test them out in advance. You don’t want to wait until you need them and realize the vendors are sold out or there aren’t any available in your area. By taking these precautions, you can help ensure a safe and enjoyable winter season in your RV.